
Free preview · full pattern in the Vintage Crochet Edgings & Trims
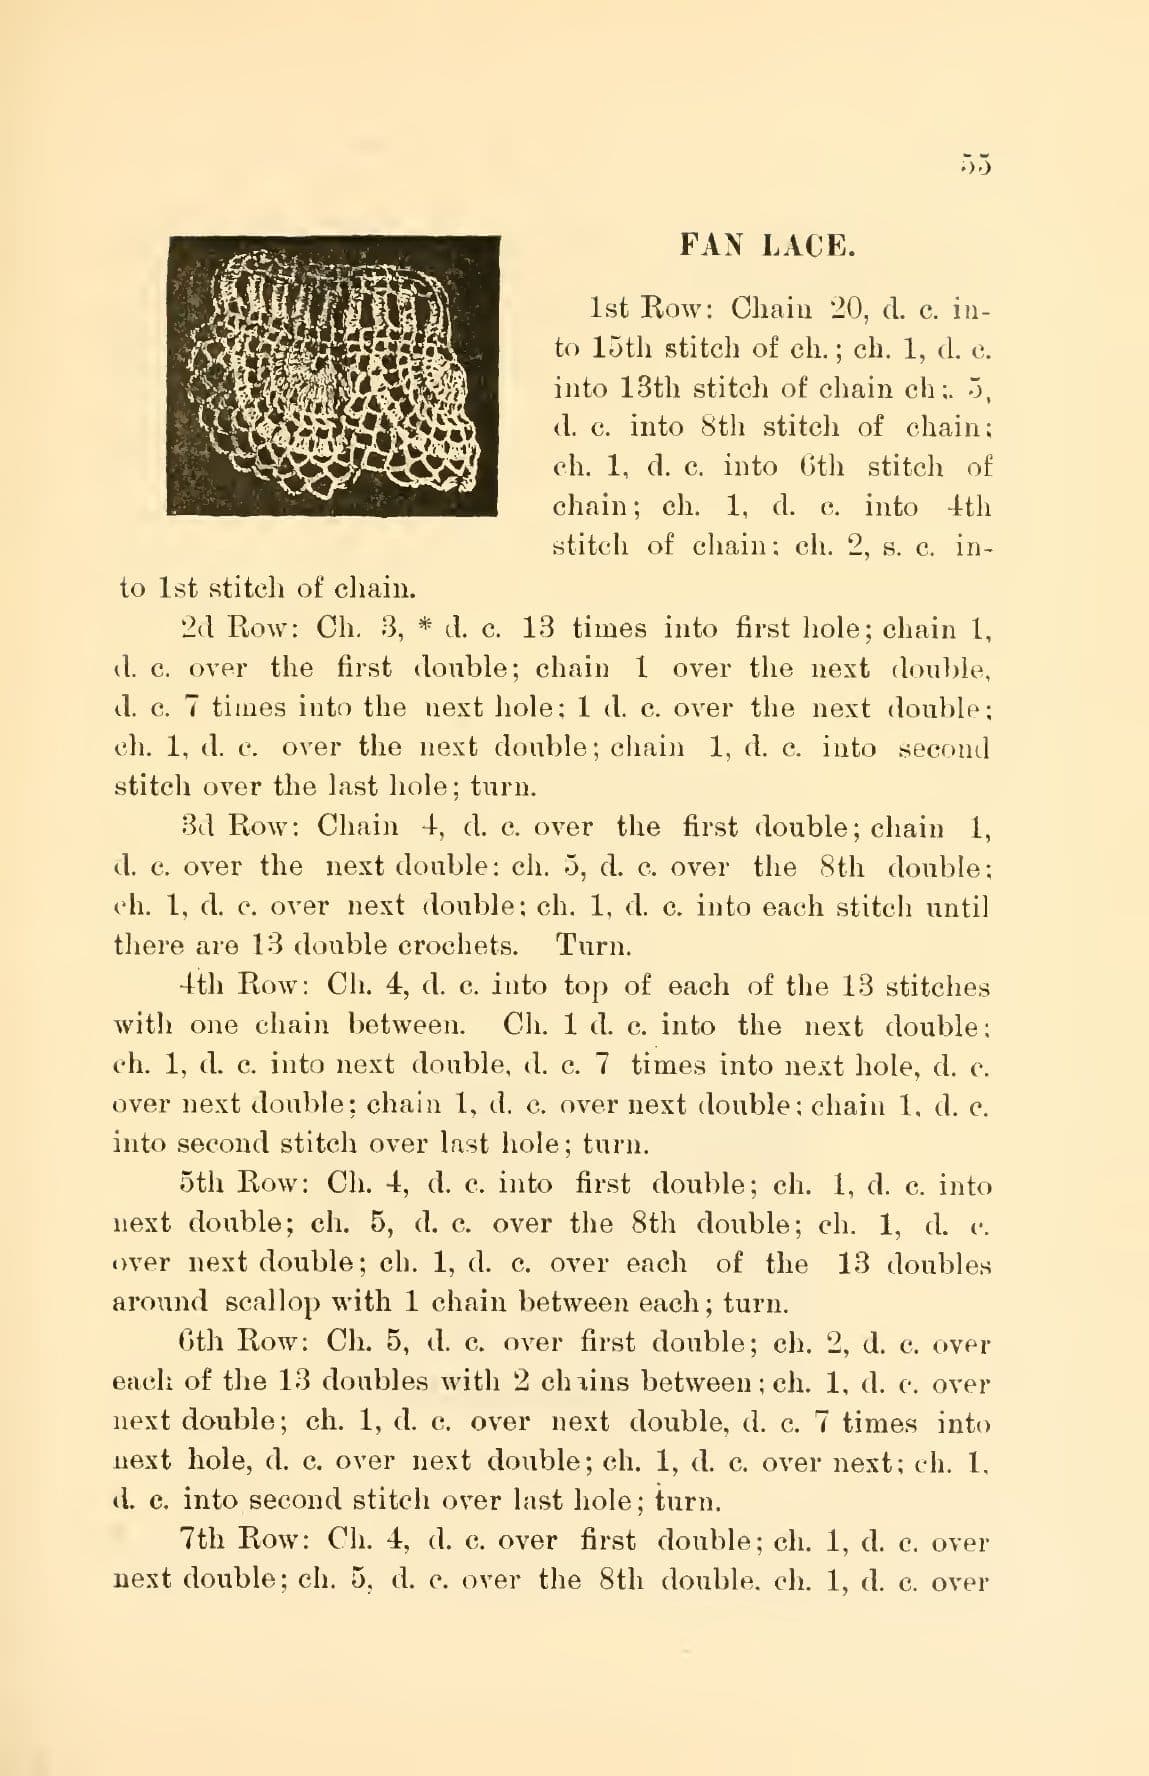
Fan Lace (1888): vintage crochet pattern
A fan edging on a narrow chain-and-double heading: thirteen doubles are worked into the first hole and then carried outward round the fan — first as doubles with chain-1 between, then chain-2, then groups of three doubles, then chain-5 loops — while a seven-double cluster is repeated in the heading on every second row.
By the crochetpatterns.io editorial team · Updated · Editorial policy · pattern testing in progress
| Detail | Value |
|---|---|
| Skill level | Intermediate |
| Yarn weight | Lace (#0) |
| Yardage | Not printed. (as printed; yardage not given) |
| Hook | 5 mm |
| Gauge | No gauge printed. |
| Finished size | No finished measurement is printed for this edging. It is worked to the length of the piece it trims, so its length is set by that piece. |
| Time | about 3 hours |
Materials
- Crochet cotton — the book prints no size; it names spool cotton or German crochet cotton and says the latter is much the best
- Steel crochet hook to suit the thread
- Tapestry needle for the ends
- Hook: Check: the book prints no hook number for this design. It names a hook size only twice in its whole 114 pages — “a long bone hook No. 6” for the Crochet Dress for Child on page 60 and “a crochet hook No. 12” for the Teapot-Cosy on page 98, both of which are in this file. Neither is an 1888 maker's size that reads across to a modern number for anything else. Match the hook to whatever thread or yarn you choose, and change size until the work lies flat.
Yarn Kit & Substitution Options
This pattern calls for 350 yards of weight #0 yarn. Select a suggested yarn to see required skeins and estimated cost:
Caron Simply Soft · 100% Acrylic
315 yds per skein · High-yield yardage, silky no-scratch texture
2 skeins required
approx. $$10.98 total
Abbreviations (US terms)
- chain
- single crochet
- double crochet
- stitch
- stitches
- repeat
- skip
- space
- shell
- row
- loop
Notes before you start
- Source: "Fan Lace", Instructions for Crochet Work, Western Lace Manufacturing Company, 218 State Street, Chicago, Ill., 1888. Public domain in the USA.
- As printed — materials: “The Lace Edgings on pages 25, 27, 29, 37, 49, 52, 53, 55, 56, 59, 70, 73, 76, 79, 81, 82, 84, 95, 96, 101, 103, 104, 106, 107, 109, can be made of spool cotton or German crochet cotton, the last being much the best. It is not desirable to use linen as it does not wear well.” (book page 113); No thread number, hook number or quantity is printed.. Gauge: Not given.
- Modernisation note: Stitches are converted by this book's own printed key, “DESCRIPTION OF TERMS USED IN CROCHET”, book page 5 (image p-011.jpg) — not by the look of the abbreviation and not from the date. The key settles the question outright: this 1888 Chicago book uses MODERN US stitch names, the same ladder our 1891 Butterick uses and the opposite of the British-style ladder in the 1913 to 1916 Priscilla books. Its “Single Crochet” is: “Pass the hook through a loop of the last row, bring cotton through, throw cotton around the needle and pass it through the two loops on the needle.” One pull-up and two loops worked off together — the modern US single crochet, not a British double. Its “Double Crochet” is: “Throw cotton once around the needle, pass the hook through a loop of the preceding row, bring cotton through, then take cotton up and bring it through two loops twice.” One wrap before insertion, three loops worked off two at a time twice — the modern US double crochet, not a US single. Its “Half Double Crochet” is: “Like double crochet, only pass the cotton through the three loops on the needle, instead of passing it through two loops twice.” — the modern US half double. Its “Treble” is: “Throw the cotton twice around the needle, and work as double crochet, but bring cotton through two loops three times.” — the modern US treble. Its “Double Double Crochet” is: “Throw the cotton over the needle three times, work as double crochet, but draw the cotton through two loops four times.” — the modern US double treble, written dtr below. The WRAP COUNTS are the decisive evidence and they are printed rather than inferred: none for single, one for double, two for treble, three for double double, with the loops worked off two at a time in every case. So this book's s. c., d. c., h. d. c., t. and d. d. c. are written sc, dc, hdc, tr and dtr below with no shift of height.
- Modernisation note: Two of the book's terms do NOT map straight across, and both are handled explicitly rather than quietly. Its “Close Chain Stitch” (page 5) is: “Insert the hook in the loop of preceding row, and draw cotton through it and the loop on the needle at the same time.” That is what we call a slip stitch worked into the fabric, and it is written sl st below. Its own “Slip Stitch” (page 6) is a different move — a joining, not a stitch: “This stitch is used in joining. Take the hook from the last loop worked, pass it through the loop where the work has to be joined; then take the first loop spoken of and draw it through.” Where a design uses sl. st. in that joining sense the row below says join with a sl st and keeps the book's own wording; where it plainly means travelling along a chain or a row, the row says sl st. Its “Ribbed Crochet” (page 6) is: “Make a single crochet in the back loop of each stitch of the row last worked. At the end of every row make a chain stitch and turn the work; then begin the next row.” — written sc in blo below.
- Modernisation note: The book prints its own short table, “ABBREVIATIONS USED IN DIRECTIONS”, book page 6 (image p-012.jpg): “l. — Loop. ch. st. — Chain Stitch. cl. ch. st. — Close Chain Stitch. s. c. — Single Crochet. d. c. — Double Crochet. h. d. c. — Half Double Crochet. t. — Treble. d. d. c. — Double Double Crochet. p. — Picot. r. c. — Ribbed Crochet. sl. st. — Slip Stitch.” Note that its letter for treble is a bare “t.”, not “tr.”; several designs also write “T” or “t. c.” for the same stitch, and all three are written tr below. Most designs spell the stitches out in words anyway, and both forms are written in modern shorthand here.
- Modernisation note: The book's wording is written in modern US form: “needle” always means the crochet hook and is written hook; “set the needle into” = insert the hook in; “fill the ring with” = work the stitches into the ring; “miss” = sk; “catch down” and “fasten” = join with a sl st or a sc, according to what the row is doing; “throw the cotton over the needle” = yo; “d. c. 3 times in the same place” is written 3 dc in the same place; “repeat from *” = rep from *. Ordinal row names (“Ist Row”, “2d Row”, “3d Row”) are written Row 1, Row 2, Row 3, and Round where the design works in the round. The book's own spellings are kept in the design names as printed.
- Modernisation note: Several of these designs print as one solid paragraph with no row numbering at all, the new row marked only by the word “turn”. Those are split here into one row or step per line at the book's own “turn”, and the book's own sub-headings (BORDER, SCALLOP FOR TOP OF BOOTEE, For the Heading and so on) are kept as section headings. Stitch order and counts are unchanged and nothing is added.
- Modernisation note: The scanned text of this book carries the usual optical-reading slips, and every figure below was read back against the 220 dpi page image rather than trusted from the scan: the scan's “Ist” is 1st, its “Sth” is 8th, its “LO” and “lO” are 10, its “+” and “-L” standing in place of a number are the figure 4, its “§” is 5, its “Y” and “)” are 9, its “S” inside a number is 8, and its “e”, “¢”, “«” and “@” are all the letter c, so that “d. ec.”, “d. «.”, “cd. c.” and “a. c.” are all d. c. Where the scan and the printed page disagree, the printed page is followed and the disagreement is recorded as a Check note.
- Modernisation note: No gauge is printed for this design. The book prints a gauge exactly once in its whole 114 pages — for the Crochet Dress for Child on page 60, which is in this file — and gives none for any other design. Work a sample and change hook size until the piece lies flat.
- Modernisation note: The book prints no materials at the head of any design. It gathers them instead into one list at the back, book page 113 (image p-119.jpg), keyed to the page each design appears on rather than to its name. The line covering this design is quoted verbatim in the original materials above. Nothing is invented to fill the gaps that list leaves.
- Modernisation note: No yardage is printed for this design, and none is estimated here.
- Modernisation note: No finished measurement is printed for this edging. It is worked to the length of the piece it trims, so its length is set by that piece.
- Modernisation note: Check: no colour is printed for this design. The engraving photographs as a plain light thread. White and écru are recorded here as the usual period choices for the thread the book names, not as this design's printed colour.
- Modernisation note: Check: the scan splits Row 1's “in-to” across a line break twice; the printed page (book page 55, image p-061.jpg) reads into. Its “ch; 5” is ch. 5, and “5. @” is s. c.
- Modernisation note: Check: the scan reads Row 3's “until there are 13 double eroehets”; the page reads 13 double crochets, and the same 13 governs Rows 4, 5 and 6.
- Modernisation note: Check: the scan reads Row 7's tail as “3 cl. ¢. into cach of the 12 holes”; the page reads “3 d. c. into each of the 12 holes around scallop”.
- Modernisation note: Check: the scan reads Row 10's opening as “Ch. 5, s. ¢ into top of each loop around scallop with 5 ch. between + ch.”; the page reads “with 5 ch. between, 4 ch.”, the 4 being the turning chain that starts the heading again.
Row progress: 0 of 10 done (0%)
The lace
0 of 10 done- Row 1: ch 20, dc into the 15th st of the ch; ch 1, dc into the 13th st of the ch; ch 5, dc into the 8th st of the ch; ch 1, dc into the 6th st of the ch; ch 1, dc into the 4th st of the ch; ch 2, sc into the 1st st of the ch.Mark row complete
- Row 2: ch 3, *13 dc into the first hole; ch 1, dc over the first double; ch 1 over the next double, 7 dc into the next hole; 1 dc over the next double; ch 1, dc over the next double; ch 1, dc into the second st over the last hole; turn.Mark row complete
- Row 3: ch 4, dc over the first double; ch 1, dc over the next double; ch 5, dc over the 8th double; ch 1, dc over the next double; ch 1, dc into each st until there are 13 dc; turn.Mark row complete
- Row 4: ch 4, dc into the top of each of the 13 sts with one ch between; ch 1, dc into the next double; ch 1, dc into the next double, 7 dc into the next hole, dc over the next double; ch 1, dc over the next double; ch 1, dc into the second st over the last hole; turn.Mark row complete
- Row 5: ch 4, dc into the first double; ch 1, dc into the next double; ch 5, dc over the 8th double; ch 1, dc over the next double; ch 1, dc over each of the 13 doubles around the scallop with ch 1 between each; turn.Mark row complete
- Row 6: ch 5, dc over the first double; ch 2, dc over each of the 13 doubles with 2 chains between; ch 1, dc over the next double; ch 1, dc over the next double, 7 dc into the next hole, dc over the next double; ch 1, dc over the next; ch 1, dc into the second st over the last hole; turn.Mark row complete
- Row 7: ch 4, dc over the first double; ch 1, dc over the next double; ch 5, dc over the 8th double; ch 1, dc over the next double; ch 1, 3 dc into the next hole, 3 dc into each of the 12 holes around the scallop.Mark row complete
- Row 8: ch 5, sc between each of the three doubles around the scallop with ch 5 between; ch 1, dc over the next double; ch 1, dc over the next double; 7 dc into the next hole; dc over the next double; ch 1, dc over the next double; ch 1, dc into the second st of the chain over the last hole; turn.Mark row complete
- Row 9: ch 4, dc into the first double; ch 1, dc into the next double; ch 5, dc over the 8th double; ch 1, dc over the next double; ch 5, sc into the top of each loop around the scallop with ch 5 between; turn.Mark row complete
- Row 10: ch 5, sc into the top of each loop around the scallop with ch 5 between; ch 4, dc over the first double; ch 1, dc over the next double; ch 5, dc over the 8th double; ch 1, dc over the next double; ch 1, dc into the second st over the last hole; ch 4, dc over the first double; ch 1, dc over the next; 7 dc into the next hole; ch 1, dc over the next double; ch 1, dc over the next; ch 4, sc back into the same st; ch 3, turn, 13 dc into the first hole and rep the scallop from the star. Each scallop joins to 4 loops of the preceding row.Mark row complete
Working on:
Row 1: ch 20, dc into the 15th st of the ch; ch 1, dc into the 13th st of the ch; ch 5, dc into the 8th st of the ch; ch 1, dc into the 6th st of the ch; ch 1, dc into the 4th st of the ch; ch 2, sc into the 1st st of the ch.
Continue this pattern
The rest of the Fan Lace (1888) pattern is in the Vintage Crochet Edgings & Trims
Still to come in the full pattern:
- Finishing
Included with 618 patterns for $9 — $0.01 per pattern.
Errata
No corrections have been published for this pattern. Found a mistake? Tell us and we will log the fix here with a date.
Your notes on this pattern
Keep track of the yarn, hook and changes you used. Saved in this browser only — nobody else can see it.
Frequently asked questions
Where is the Fan Lace pattern from?
It was published as "Fan Lace" in Instructions for Crochet Work by Western Lace Manufacturing Company, 218 State Street, Chicago, Ill. in 1888. The publication is in the public domain in the United States; this version is transcribed and modernised by crochetpatterns.io.
What yarn or thread do I need for the Fan Lace?
See the materials list. Not printed.
What hook should I use?
Check: the book prints no hook number for this design. It names a hook size only twice in its whole 114 pages — “a long bone hook No. 6” for the Crochet Dress for Child on page 60 and “a crochet hook No. 12” for the Teapot-Cosy on page 98, both of which are in this file. Neither is an 1888 maker's size that reads across to a modern number for anything else. Match the hook to whatever thread or yarn you choose, and change size until the work lies flat. Gauge: No gauge printed.