
Free preview · full pattern in the Heirloom Doilies & Tablecloths
Tea Table Cloth, No. 6 (1970): vintage crochet pattern
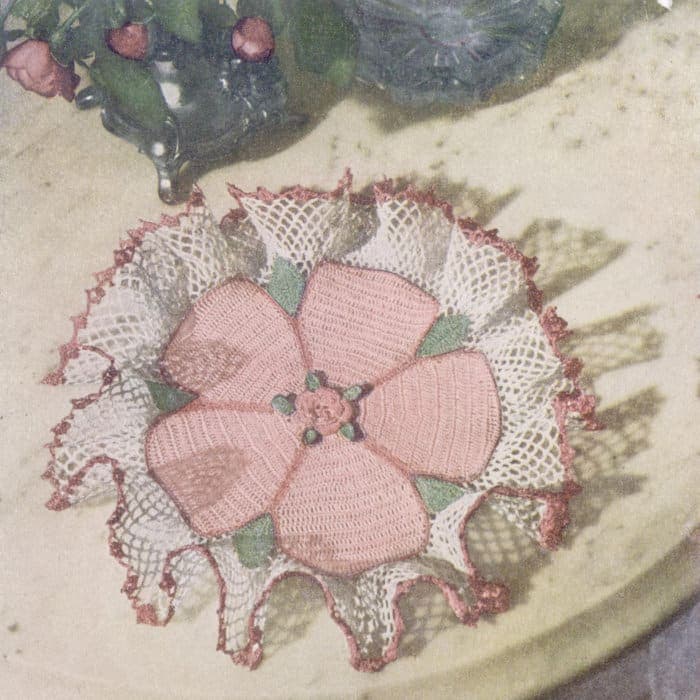
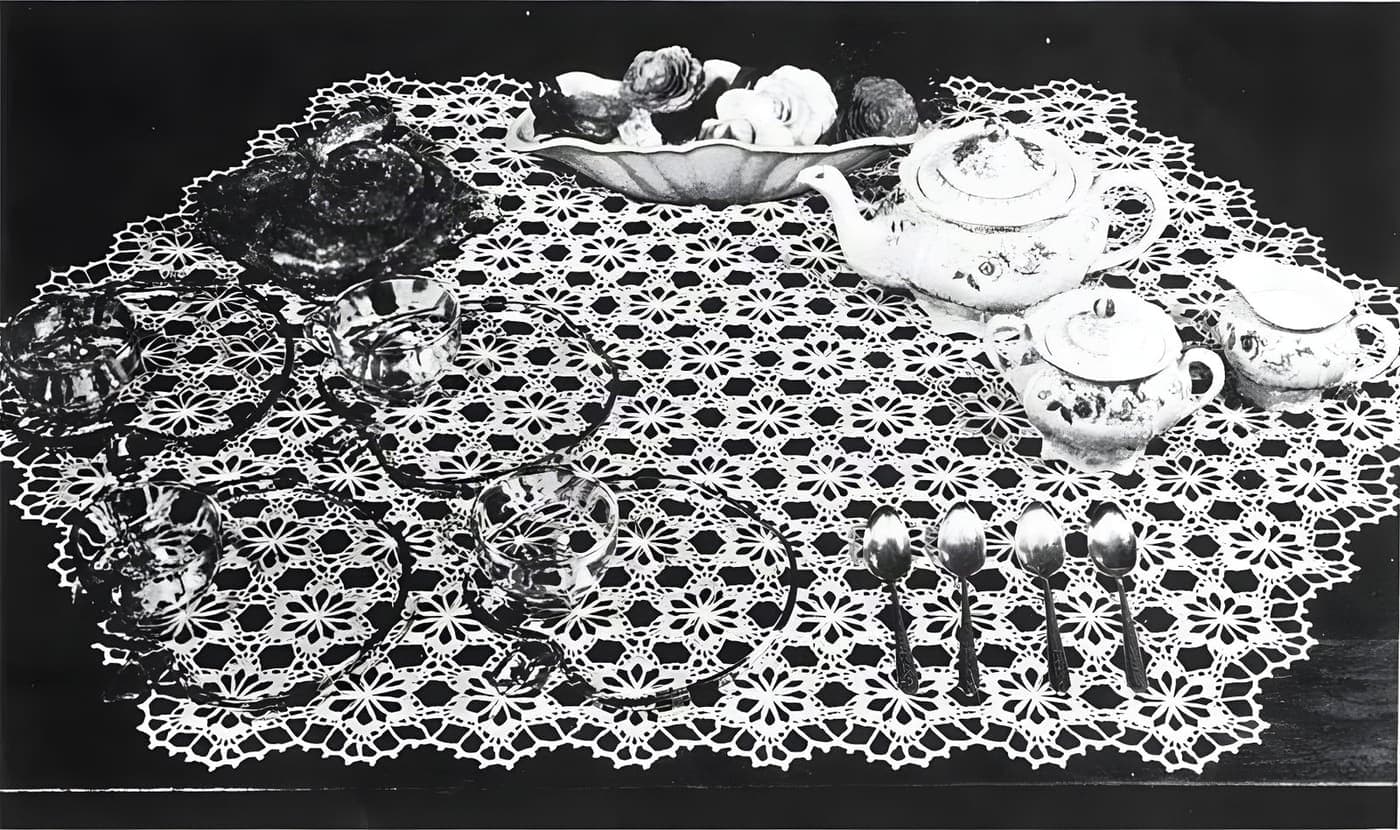
A tea table cloth of 113 hexagon blocks in cream and salmon rose cotton: each block is a six-petal daisy made on a daisy winder (flower loom), each petal covered in salmon rose double crochet and framed with a cream picot round, joined by picots in rings around a center block, with a picot-loop edge.
By the crochetpatterns.io editorial team · Updated · Editorial policy · pattern testing in progress
| Detail | Value |
|---|---|
| Skill level | Advanced |
| Yarn weight | Lace (#0) |
| Yardage | 900–1000 yd (823–914 m) |
| Hook | 1.3 mm |
| Gauge | Not printed. The cloth is 31 × 42 in; make one block first and compare it with the photo. |
| Finished size | 31 × 42 in (79 × 107 cm); 113 blocks. |
| Time | about 9 hours |
Materials
- A daisy winder or flower loom that makes daisies of the printed size (e.g. 2 in / 5 cm)
- Mercerized crochet cotton (the original's size and ball size are not printed in this pattern): 4 balls cream and 3 balls salmon pink.
- 1.3 mm (US steel 10) crochet hook.
- Tapestry needle for weaving daisy centers and fastening off
- Hook: Start with 1.3 mm (US steel 10); change size to match the printed size.
Yarn Kit & Substitution Options
This pattern calls for 1000 yards of weight #0 yarn. Select a suggested yarn to see required skeins and estimated cost:
Caron Simply Soft · 100% Acrylic
315 yds per skein · High-yield yardage, silky no-scratch texture
4 skeins required
approx. $$21.96 total
Abbreviations (US terms)
- chain
- slip stitch
- single crochet
- double crochet
- double treble crochet
- space
- stitch
- stitches
- row
Notes before you start
- Source: "Tea Table Cloth" (No. 6), Designs for Crazy Daisy Winder: Crochet Time Cut in Half, Hero Manufacturing Company, 1970. Public domain in the USA.
- As printed — materials: Lily SKYTONE Mercerized Crochet Cotton:—4-balls Cream and 3-balls Salmon Rose.; Crochet hook size 10.; CRAZY DAISY WINDER.. Gauge: Not given.
- Modernisation note: The first section is the book's general "To Make Daisies" directions, printed once on page 2 and referenced by each design as "following instructions on page 2"; it is repeated here so the pattern stands alone. "Ill." is written as "Illustration".
- Modernisation note: The book was written for its maker's 12-spoke daisy winder. Any daisy winder or flower loom with 12 spokes that makes daisies of the same size will work; the book does not print the daisy diameter, so make and edge one daisy first and compare it with the printed block or article size.
- Modernisation note: The original is already in US terms. Abbreviations were modernised: "lp/lps" → loop(s), "p" → picot, "2d/3d" → 2nd/3rd, "thru" → through, "tog." → tog, "bal. of" → rest of, "thread over" → yo, "ch st" → ch, "Cluster" → cluster. Run-on paragraphs were split into one row or step per line; no stitches were added, removed or reordered.
- Modernisation note: "Cut 6″ long, thread to a needle and fasten off on back" is kept as printed ("6 in"); it means cut the working yarn leaving a 6 in (15 cm) tail.
- Modernisation note: The book prints plain hook numbers. For cotton thread they are read as US steel hook sizes (13 = 0.85 mm, 10 = 1.3 mm, 9 = 1.4 mm, 7 = 1.65 mm, 5 = 1.9 mm, 3 = 2.1 mm). Check: the book does not say steel or aluminum; match the printed block size rather than the number.
- Modernisation note: "See Blocking Instructions on page 31" is replaced by the book's general blocking directions, printed in the finishing steps.
- Modernisation note: Check: the six-petal daisy winds only 3 pairs of spokes (1 and 2, 10 and 9, 6 and 5), 5 times each, and the center is woven under 3 petals and back over 2; this differs from the general directions and is kept as printed.
- Modernisation note: Check: the block counts (1 + 6 + 12 + 18 + 24 + 30 = 91, plus 2 rows of 11 = 113) match the printed total; the two extra rows of 11 turn the round layout into the oblong shape.
- Modernisation note: Check: Lily Skytone's thread size and ball yardage are not printed in this pattern; the book lists 250-yd balls of the same cotton in No. 28.
- Modernisation note: Metric conversions and modern yarn/thread suggestions were added; they are not in the original.
Row progress: 0 of 16 done (0%)
To make daisies (the book's general directions)
0 of 16 done- Illustration A — back view with spokes released: Hold winder in left hand with flat side toward you. Holding knob between thumb and forefinger of right hand with thumb at bottom, push thumb to left to turn knob and release spokes.Mark row complete
- Illustration B — single petal daisy wrapped over 1 spoke: With left thumb, hold yarn across center of winder leaving end extended about 1 in beyond center.Mark row complete
- With right hand, pass yarn from left to right around spoke at top (No. 1); across center of winder from right to left around spoke directly opposite (No. 2); across center of winder from left to right around spoke No. 3 at right of 1st spoke wrapped; across center, from right to left around spoke No. 4 at left of 2nd spoke wrapped; across center, from left to right around spoke No. 5; across center, from right to left around spoke No. 6.Mark row complete
- Continue in this way wrapping each spoke once, always passing across center to wrap spoke opposite, until the 12th spoke is wrapped. Bring yarn across center and cut end about 1 in beyond center. Make center before removing daisy from winder (see Illustration E).Mark row complete
- Illustration C — double petal daisy wrapped over 1 spoke: With left thumb hold yarn at center leaving end to extend about 1 in; with right hand, pass yarn from left to right around spoke No. 1 at top; across center; from right to left around spoke No. 2 directly opposite; wrap around these 2 spokes once more in same way.Mark row complete
- Across center, from left to right around spoke No. 3 at right of spoke 1st wrapped; across center, from right to left around spoke No. 4 at left of 2nd spoke wrapped; wrap these 2 spokes once more; across center, from left to right around spoke No. 5; from right to left around spoke No. 6; around these 2 once more.Mark row complete
- Continue in this way wrapping twice around 2 spokes exactly opposite then passing on to the next 2, until all spokes are wrapped twice ending with No. 12; bring yarn across center and cut end about 1 in beyond center.Mark row complete
- If a daisy of more layers of petals is desired, wrap as many times as you desire layers of petals. Make center before removing daisy from winder (see Illustration E).Mark row complete
- Illustration D — single petal daisy wrapped over 2 spokes: With left thumb, hold yarn at center allowing end to extend about 1 in. With right hand, pass yarn from left to right around spokes Nos. 1 and 2; across center, from right to left around Nos. 3 and 4; across center, around 5 and 6; across center, around 7 and 8; across center, around 9 and 10; across center, around 11 and 1; across center, around 12 and 3; across center, around 2 and 5; across center, around 4 and 7; across center, around 6 and 9; across center, around 8 and 11; across center, around 10 and 12; across center, cut end about 1 in beyond center. Make center before removing daisy from winder (see Illustration E).Mark row complete
- To make double petal daisy wrapped over 2 spokes: Make same as single petal over 2 spokes, then continue to wrap in same way as many times as desired.Mark row complete
- Illustration E — center: Thread needle with yarn for center. Fasten at center of wrong side of daisy as for embroidery. The side of daisy toward you is the wrong side.Mark row complete
- Insert needle under 4 petals, draw yarn through tightly; bring yarn back over the last 3 of these 4 petals, insert needle under these 3 petals and 1 more making 4 petals in all; draw yarn through.Mark row complete
- Continue to bring yarn back over 3 petals and draw it under 4 petals each time until you have made 13 sts. Be sure there are 13, otherwise your center will not be complete.Mark row complete
- As the weaving sts are worked, be careful to carry around the starting yarn end of daisy, taking each weaving st over this end for at least 10 sts so as to fasten it securely. This is particularly necessary with all the cotton threads. Fasten yarn on wrong side. Cut off all ends close to center.Mark row complete
- Turn knob in opposite direction to draw in spokes and release daisy.Mark row complete
- Illustration F: right side of complete daisy.Mark row complete
Working on:
Illustration A — back view with spokes released: Hold winder in left hand with flat side toward you. Holding knob between thumb and forefinger of right hand with thumb at bottom, push thumb to left to turn knob and release spokes.
Continue this pattern
The rest of the Tea Table Cloth, No. 6 (1970) pattern is in the Heirloom Doilies & Tablecloths
Still to come in the full pattern:
- Block
- Joining blocks
- Edge
- Finishing
Included with 236 patterns for $19 — $0.08 per pattern.
Errata
No corrections have been published for this pattern. Found a mistake? Tell us and we will log the fix here with a date.
Your notes on this pattern
Keep track of the yarn, hook and changes you used. Saved in this browser only — nobody else can see it.
Frequently asked questions
Where is the Tea Table Cloth pattern from?
It was published as "Tea Table Cloth" in Designs for Crazy Daisy Winder: Crochet Time Cut in Half by Hero Manufacturing Company in 1970. The publication is in the public domain in the United States; this version is transcribed and modernised by crochetpatterns.io.
What yarn or thread do I need for the Tea Table Cloth?
Mercerized crochet cotton (size not printed). Printed: 4 balls Cream and 3 balls Salmon Rose. Ball size is not printed in this pattern (the same cotton is sold in 250-yd balls in No. 28 of the book, which would be about 1,000 yd cream and 750 yd salmon rose — check your label).
What hook should I use?
Start with 1.3 mm (US steel 10); change size to match the printed size. Gauge: Not printed. The cloth is 31 × 42 in; make one block first and compare it with the photo.